With little ones in tow for Halloween pumpkin carving contests, we have been embracing the art of painting pumpkins. We are all having fun coming up with creative pumpkin painting ideas and getting festive without the mess of pumpkin guts.
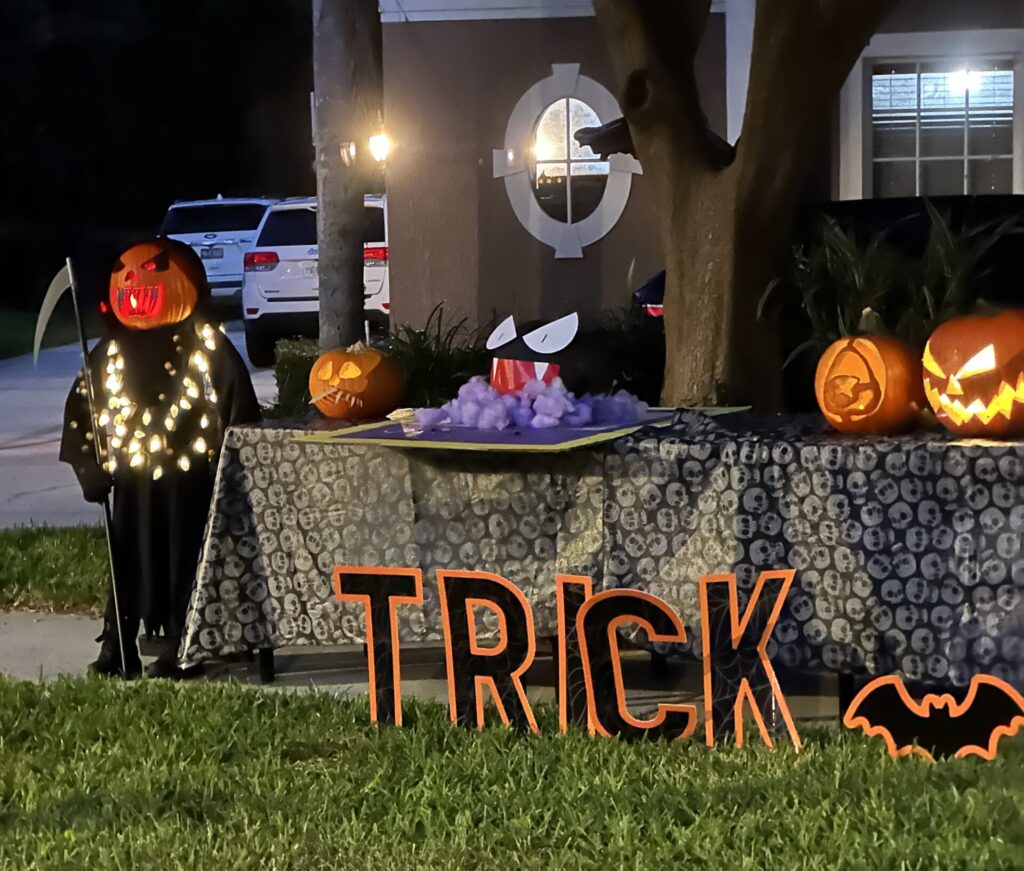
Make your own painted pumpkin by following the easy instructions below.
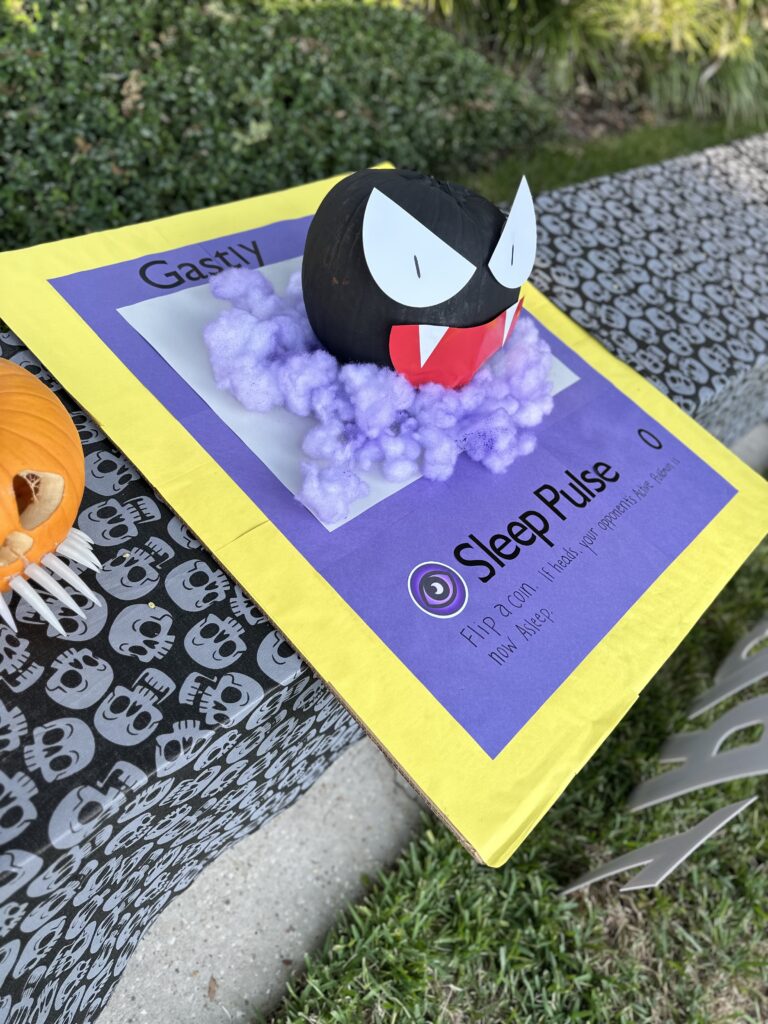
Gastly Pokémon Pumpkin Craft: A Spooky DIY for Halloween
A spooky yet adorable Gastly pumpkin inspired by the Pokémon universe. Gastly, the ghostly Gas Pokémon, comes to life in pumpkin form.
Amazon Affiliate Disclosure: I may receive a small commission if you purchase something from a link on my page. All of my opinions are my own and I only recommend products I love. Thank you for supporting small business.
Supplies
- A small round pumpkin (real or faux)
- Purple, yellow, red, white and gray cardstock or construction paper
- Glue or adhesive
- Scissors
- Black spray paint
- Cotton balls
Instructions to Paint Gastly Pumpkin
- Prepare the Pumpkin Base:
- Clean and dry the pumpkin to ensure a smooth surface for attaching the paper cutouts.
- Spray Paint the Pumpkin:
- In a well-ventilated area, apply black spray paint to the entire pumpkin.
- Let it dry completely before gluing the eyes and mouth on.
- Create the Eyes and Mouth:
- Cut out two large white semi-circles from the white construction paper for Gastly’s eyes.
- Cut smaller black circles to fit inside the white circles, creating the pupils.
- Glue the black pupils onto the white circles.
- Attach the eyes to the pumpkin, positioning them where you’d like Gastly’s eyes to be.
- Cut a curved mouth shape from the red construction paper for Gastly’s mouth.
- Cut two small triangles out of the white construction paper for Gastly’s teeth.
- Glue to the white teeth onto the curved mouth shape.
- Glue the mouth onto the pumpkin below the eyes.
- Craft the Pokémon Card Background:
- Take a large sheet of cardboard.
- Glue construction paper onto the cardboard to create a vibrant pokemon card background.
- Write Gastly’s name and other info from the card. I used my cricut to create the name and attack.
- Add the Background Mist:
- Glue stretched cotton balls around the base of the pumpkin to represent Gastly’s mist.
- Once the cotton balls are securely attached, proceed to the next step.
- Spray Paint the Mist:
- Spray paint the area around the base of the pumpkin with purple spray paint.
- Let it dry completely.
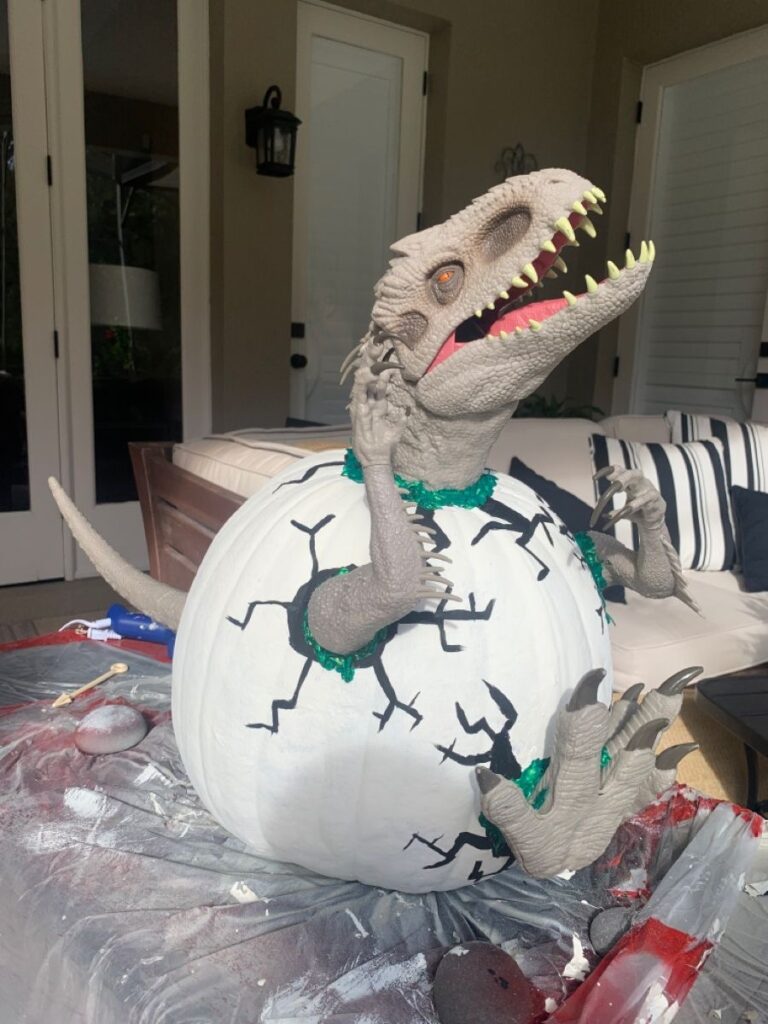
Hatching Dinosaur Painted Pumpkin: A Mesozoic Surprise
Step into a prehistoric world with a mesmerizing Hatching Dinosaur Painted Pumpkin! This pumpkin painting idea imagines a dinosaur egg cracking open, revealing the ancient creature within.
Supplies
- A medium-sized pumpkin (real or faux)
- White spray paint
- Black acrylic paint
- Hot glue gun and glue sticks
- Green acrylic paint
- Paintbrushes
- Plastic dinosaur toy or model
Instructions
- Prepare the Pumpkin:
- Clean the pumpkin’s surface to remove any dirt or debris.
- If using a real pumpkin, pat it dry.
- Spray Paint the Base:
- In a well-ventilated area, apply white spray paint to the entire pumpkin.
- Let it dry completely.
- Disassemble the Dinosaur and Position Pieces:
- Take the dinosaur apart so that you have two arms, two legs, a head, and a tail piece.
- Position the plastic dinosaur parts to look as if the dinosaur is breaking out of the pumpkin.
- Push the pieces into the pumpkin, you may need to use a knife to create an opening. Secure with hot glue (optional).
- Create the Cracks:
- Use black acrylic paint to paint around each limb and then draw realistic cracks on the pumpkin’s surface.
- Imagine the pumpkin as a hatching dinosaur egg with visible cracks.
- Make the cracks irregular and jagged for an authentic look.
- Add the Green Slime Texture:
- Apply lines of hot glue around some of the limbs, creating a textured, slimy effect.
- Paint the Dried Glue:
- Once the glue is dry, paint it with green acrylic paint.
- Highlight the raised areas to enhance the slimy appearance.
Searching for a Family Halloween Costume Idea?
I’ve got you! Now that you have painting pumpkin ideas, check out these timeless family halloween costume ideas:
How to Make DIY Flintstones Costumes— Bam Bam, Betty Rubble, Barney Rubble