Pikachu, I choose you!
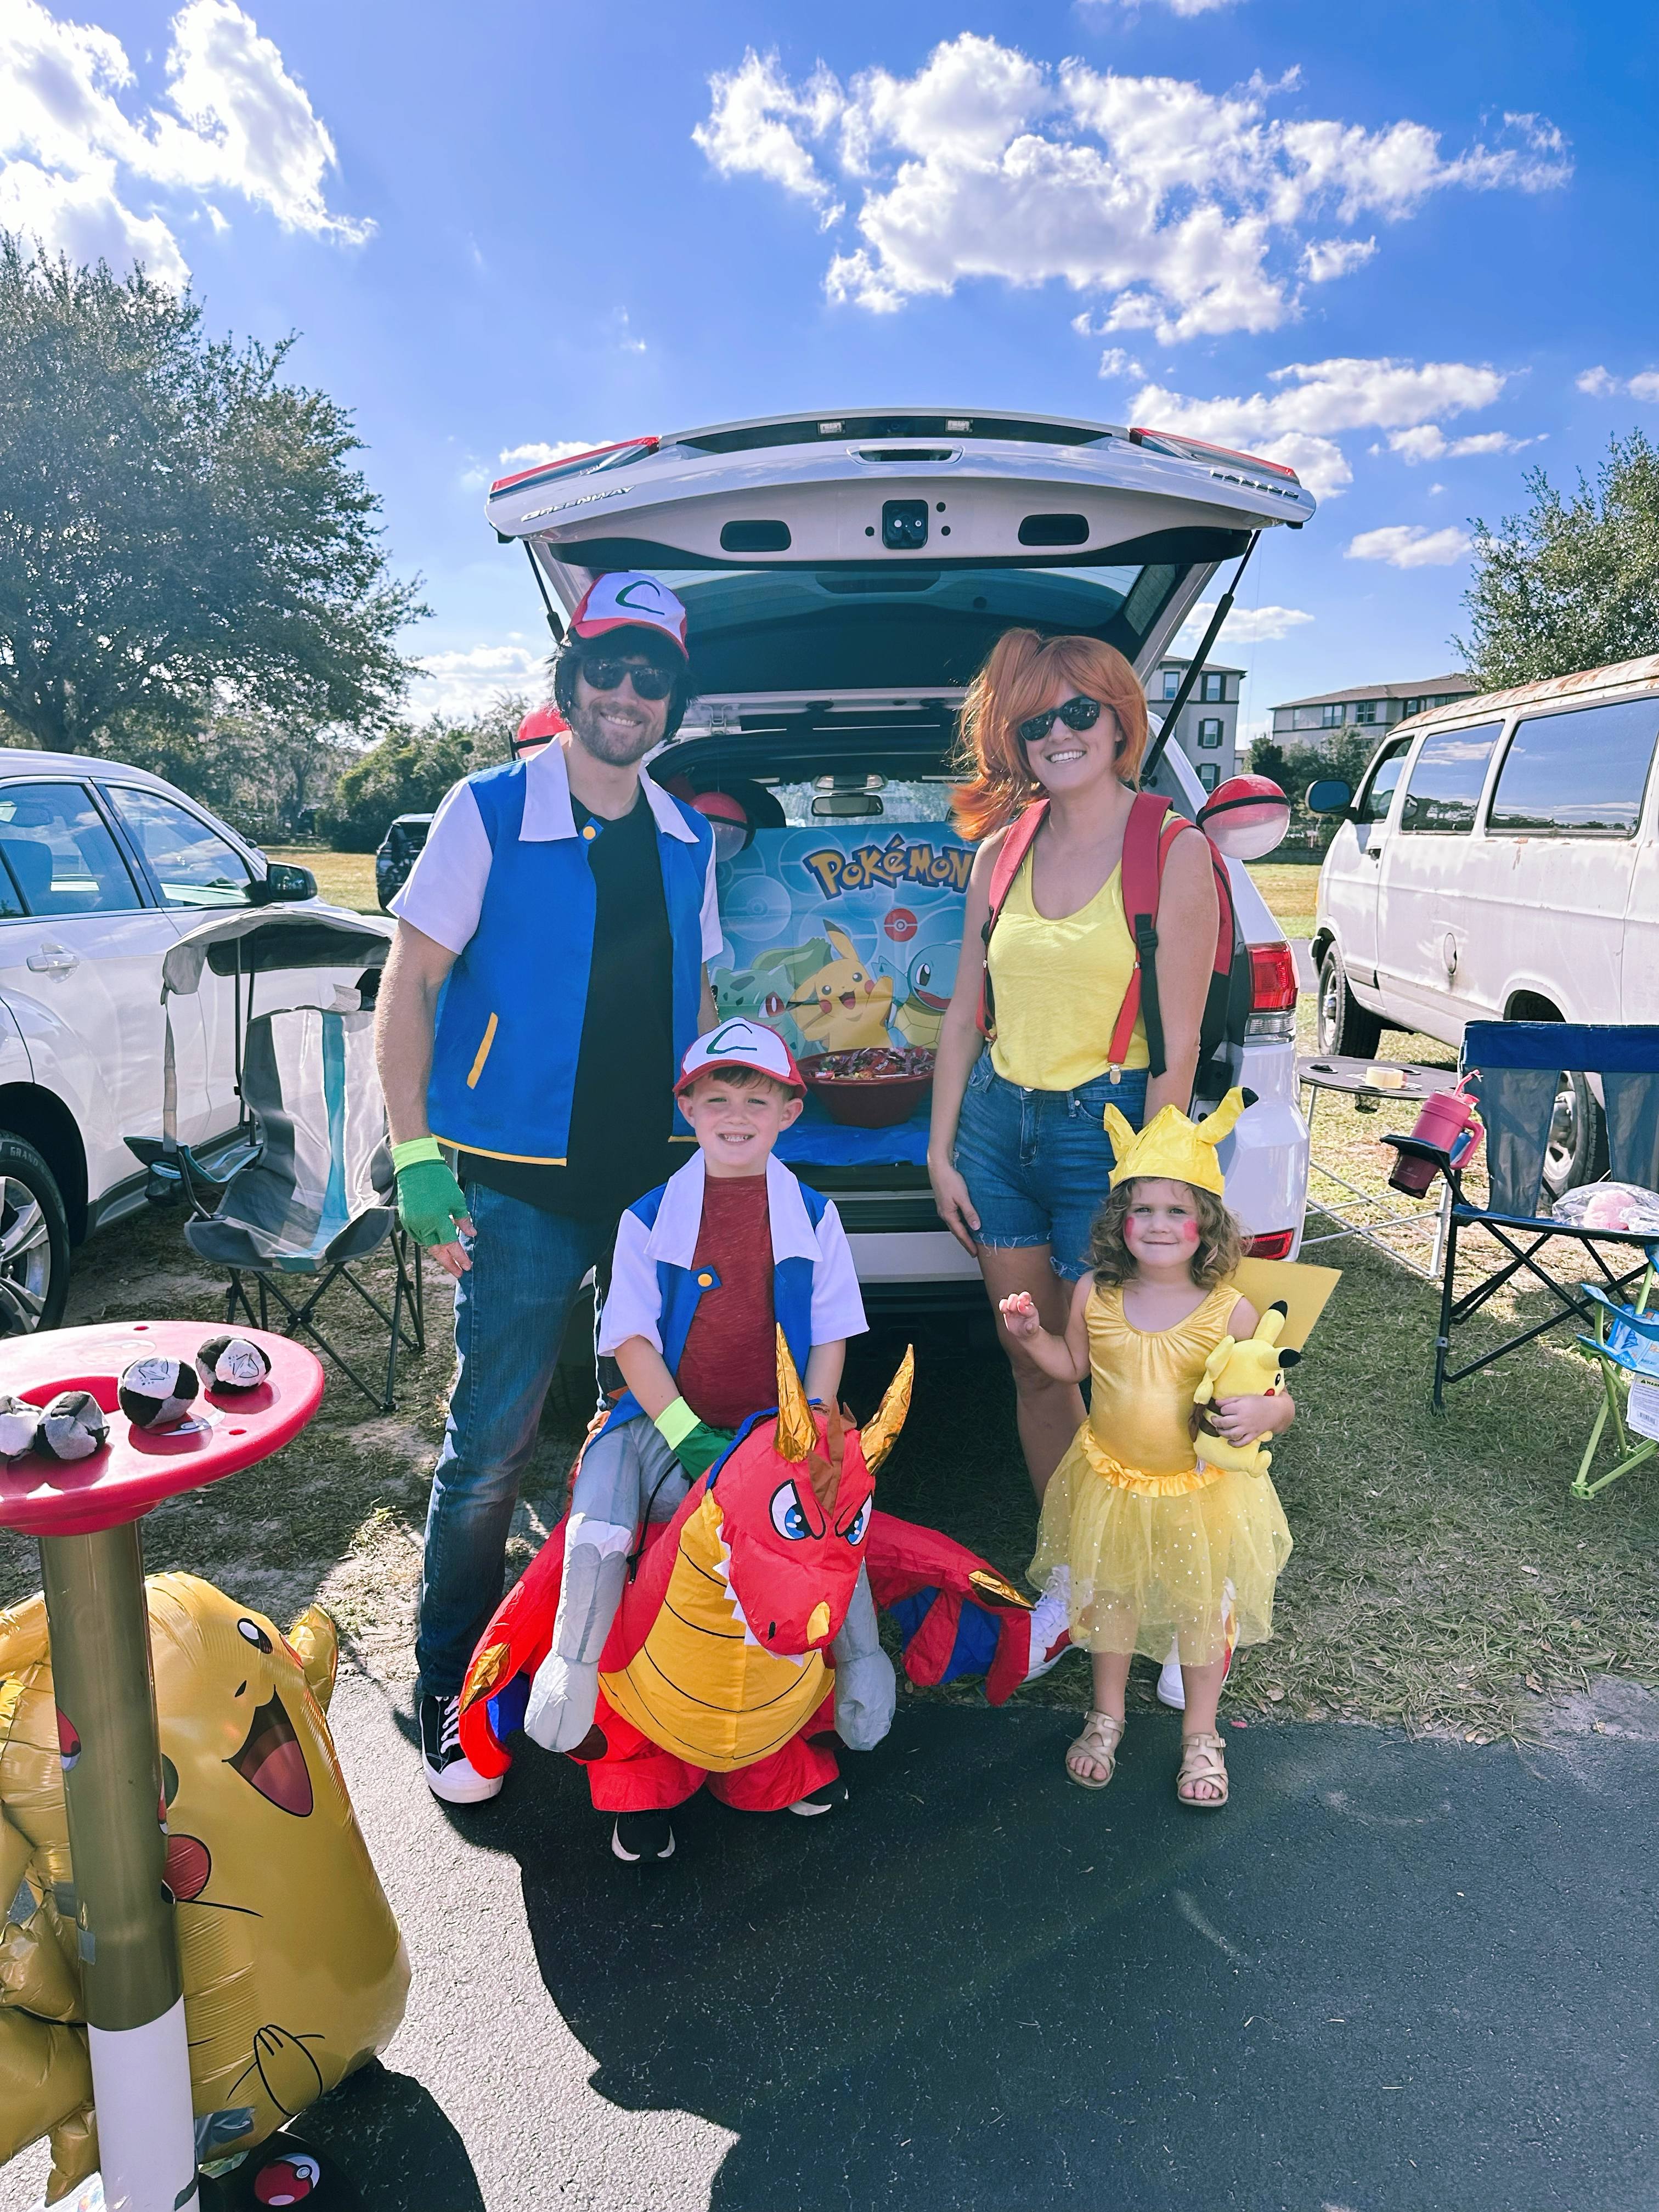
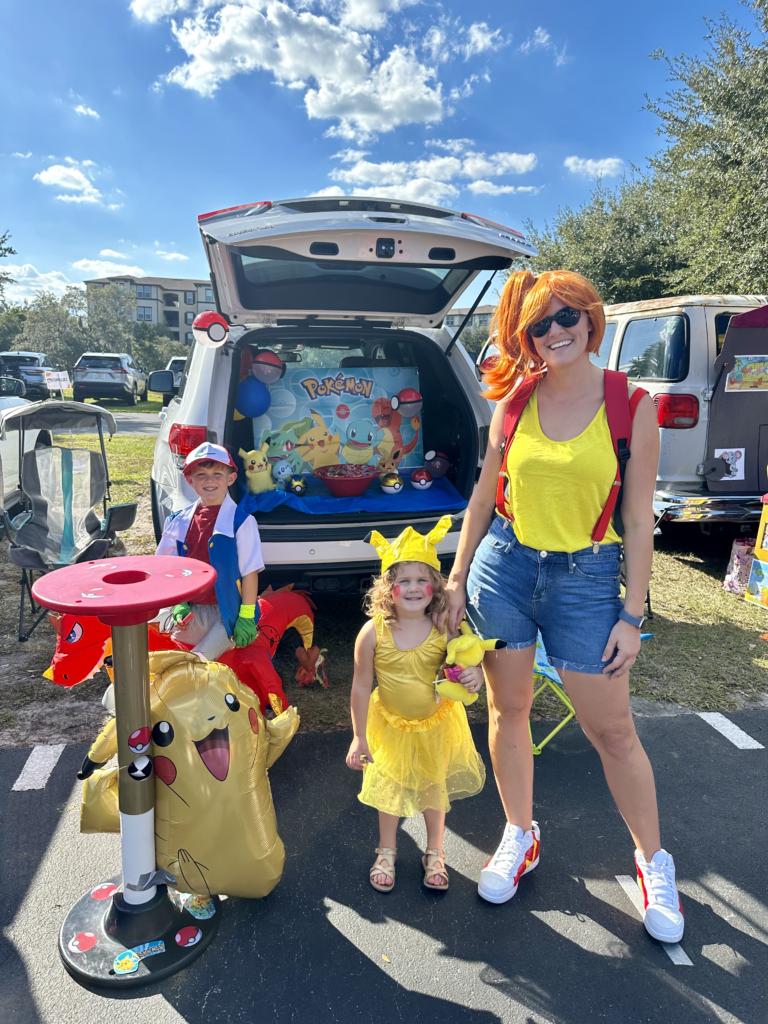
This year, Pokémon took center stage in our house. Dressing like Pokémon characters was the obvious choice for our Halloween family costume and trunk or treat transformation! Halloween was on a Tuesday so we had many costume events leading up to the main event. Pokémon costumes were perfect for being worn several ways.
Amazon Affiliate Disclaimer: I may earn a small commission if you choose to purchase any products or services from this website using my link. However, all of these opinions are my own.
Ash Riding Charizard Costume
Luke, our little Pokémon enthusiast, was set on becoming charizard (but only if it was a “super scary” charizard). We didn’t like any of the premade costumes so I searched for a dragon blow up costume. He ended up wearing it two ways—once at his school trick or treating event much more casually (with just the costume and a Pokémon hat), and fully in the ash costume for trunk or treat.
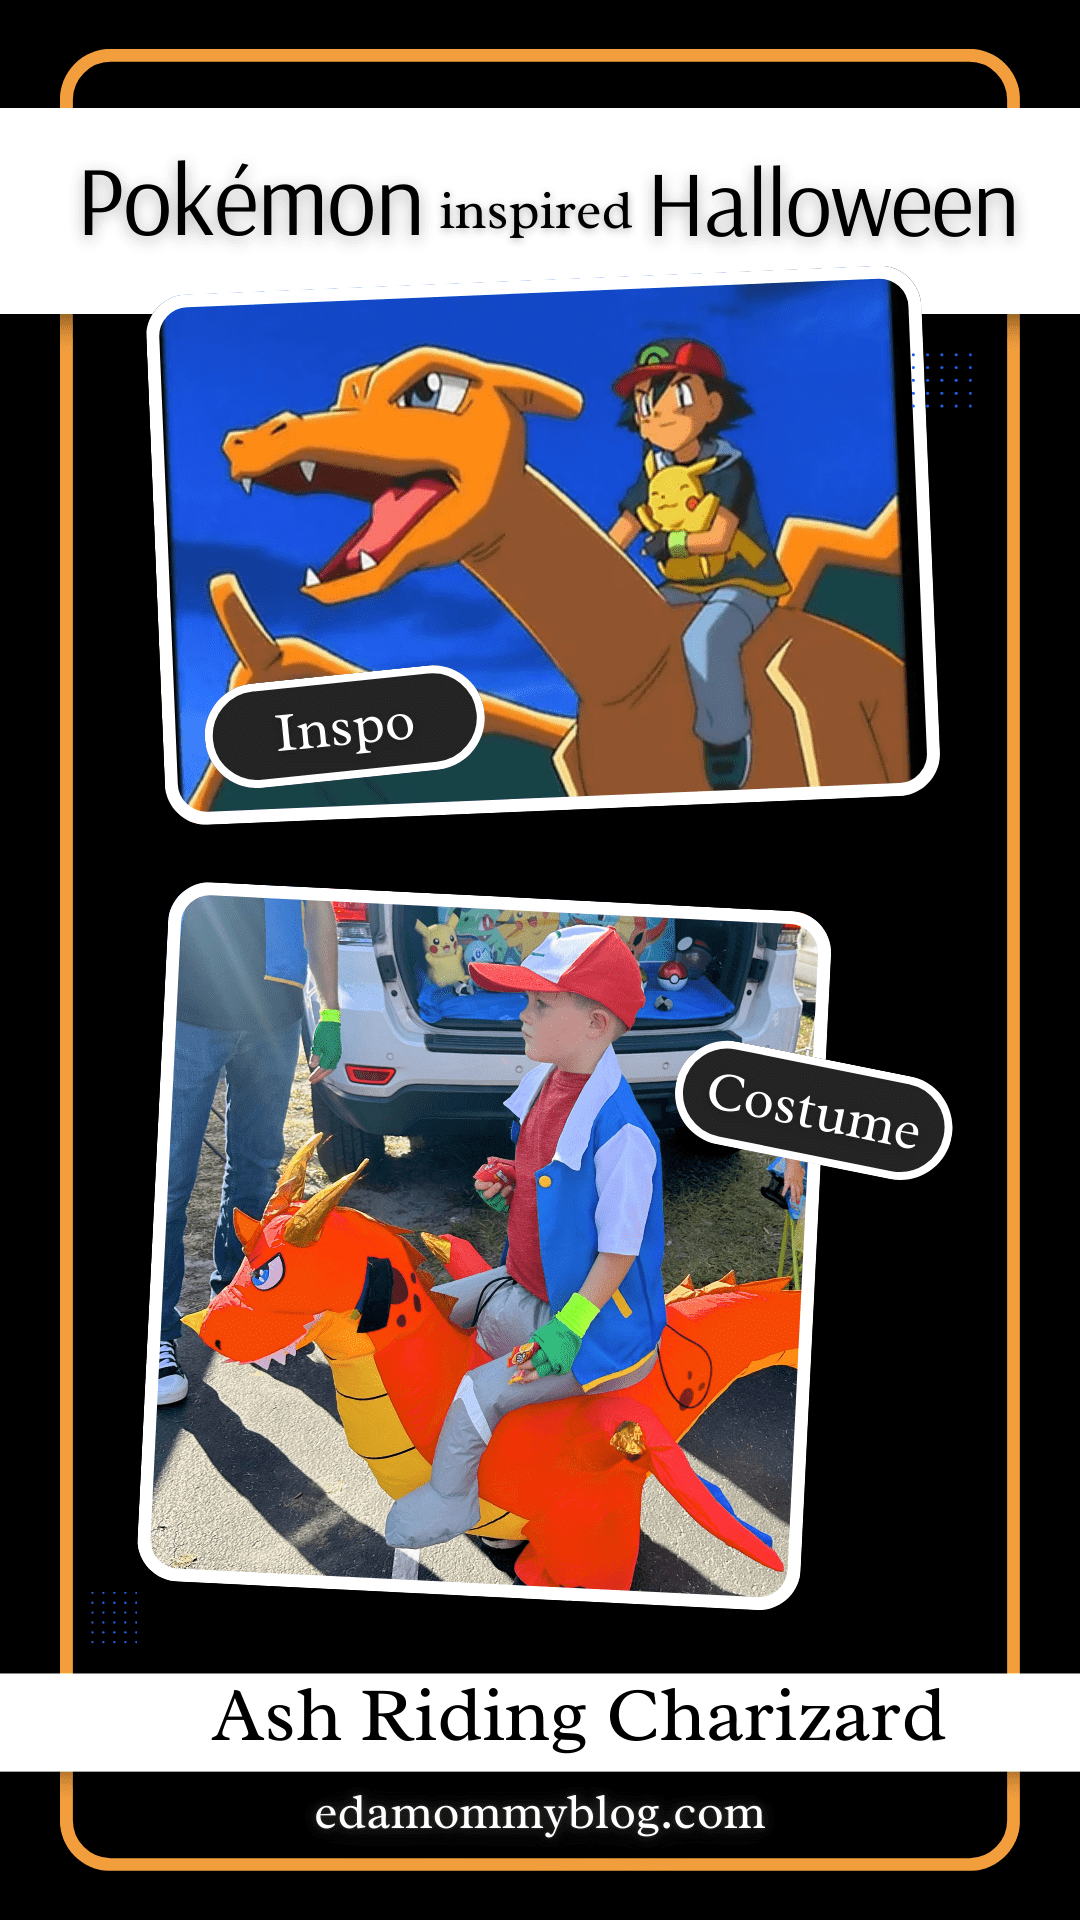
This dragon rider costume was perfect for paying homage to the iconic scenes where Ash Ketchum rides on charizard. As a bonus, I was able to paint the viking hat that came with the costume to serve as a pikachu hat for Riley’s DIY Pikachu costume.
DIY Pikachu for 3 Year Old
Over the past few months, my daughter has been so into Pikachu that she basically turned into one. Her little voice is perfect for Pikachu’s signature “Pika pika”s. Once again, the pikachu costumes that were being sold didn’t appeal much to me so I decided to craft Riley’s pikachu costume.
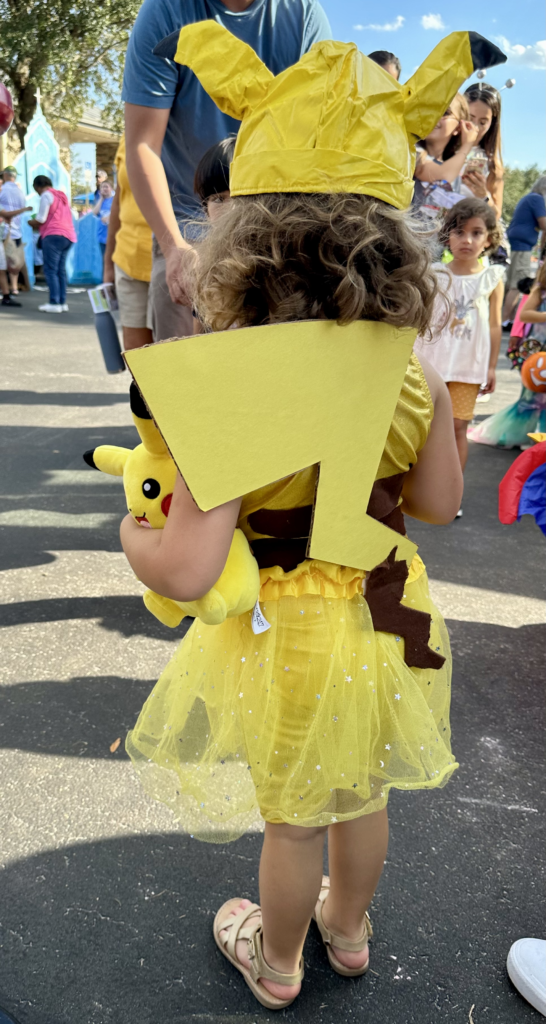
Supplies for Little Girl Pikachu DIY
- Brown felt
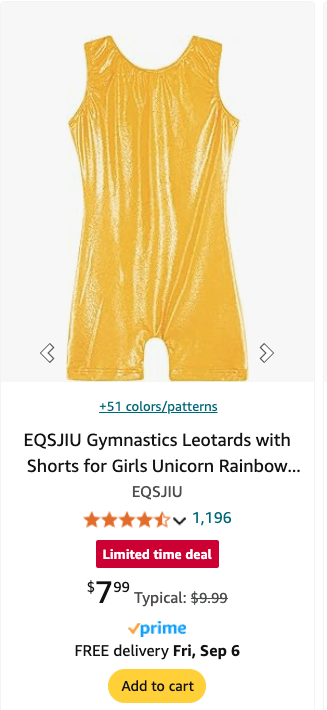
- Yellow gymnastics onesie
- Hot glue gun and glue sticks
- Yellow fabric paint
- Black fabric paint
- Yellow construction paper
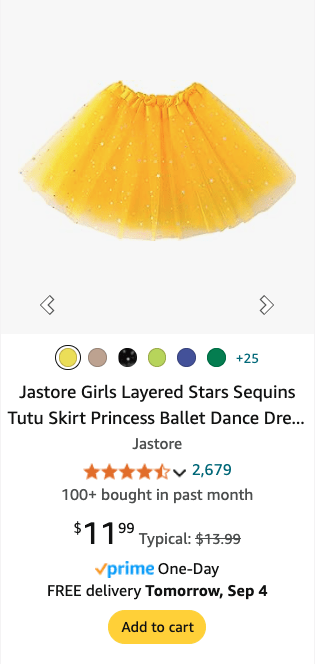
- Yellow tutu
- Cardboard
- Viking hat (or any similar helmet base). I painted the viking hat that came with my son’s dragon costume). You can also use head band and attach cloth ears (I did this for her school event).
Instructions to DIY Pikachu for Little Girl
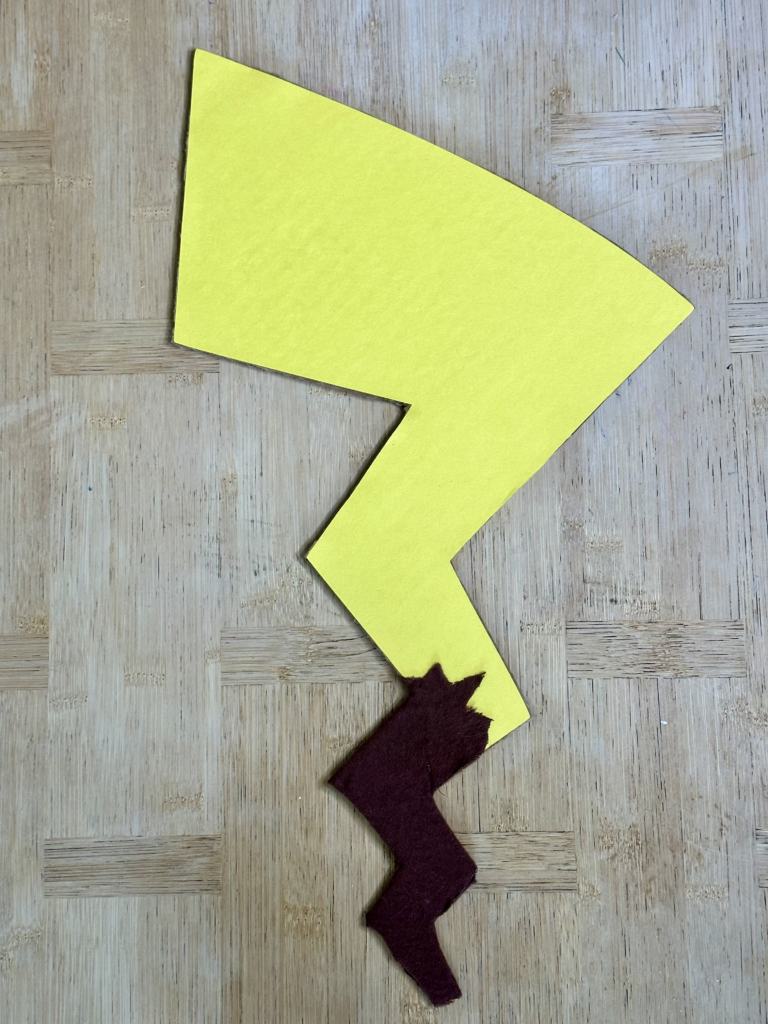
Creating a DIY Pikachu Tail
Supplies Needed:
- Cardboard (for the tail base)
- Yellow construction paper
- Brown felt
- Heavy duty scissors or box cutter
- Glue (hot glue gun or craft glue)
Instructions:
- Create the Tail Base: Begin by drawing Pikachu’s lightning bolt-shaped tail on a piece of cardboard. Make sure the size is appropriate for the costume you’re creating. Once you’re satisfied with the shape, cut out the tail using heavy duty scissors or a box cutter.
- Cover with Yellow Construction Paper: Place the cardboard tail on a sheet of yellow construction paper. Trace the shape, then cut it out. Apply glue evenly on the cardboard tail and carefully place the yellow construction paper cutout on top, smoothing out any wrinkles or bubbles.
- Add the Brown Felt Tip: To mimic Pikachu’s tail exactly, cut a small piece of brown felt to cover the bottom portion of the tail. Apply glue to the felt and attach it to the corresponding area on the tail. Press down firmly to ensure it adheres well.
- Final Touches: Allow the glue to dry completely before attaching the tail to the costume. You can secure the tail to the back of a costume using safety pins or by sewing it on if the material allows.
This DIY Pikachu tail is a quick and easy addition that perfectly complements a Pikachu costume, making it instantly recognizable.
Creating Pikachu DIY hat/ears
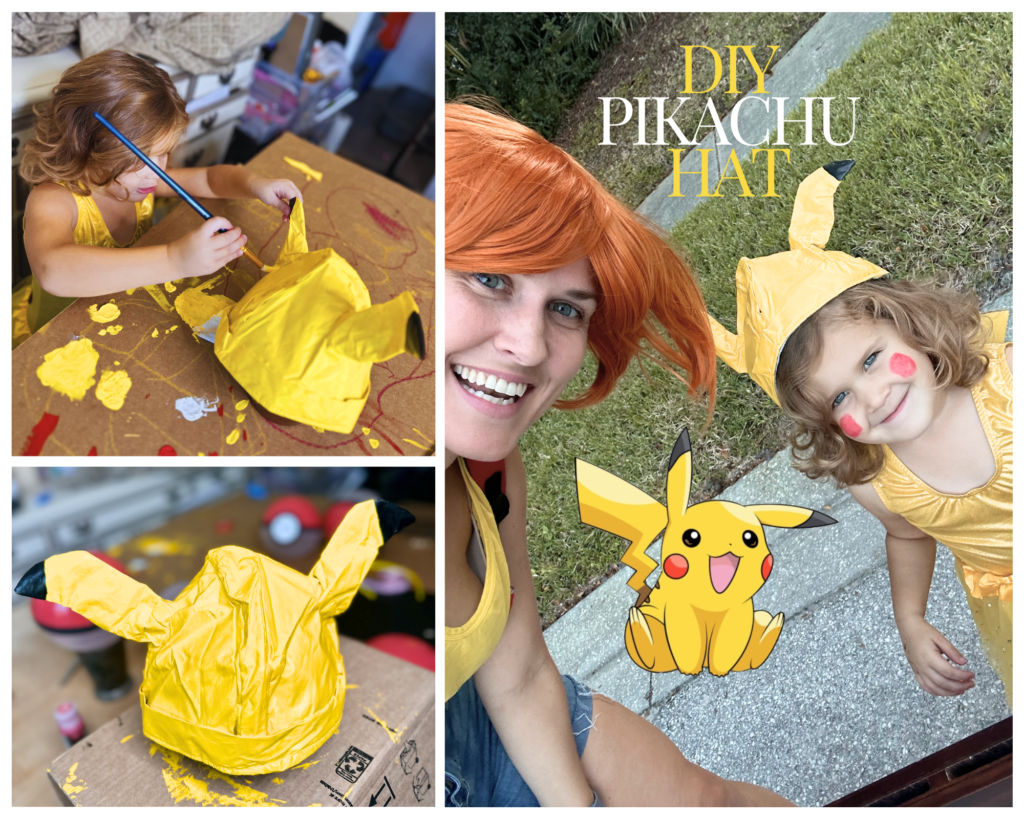
Supplies Needed:
- Viking hat (or any similar helmet base). I painted the viking hat that came with my son’s dragon costume)
- Yellow fabric paint
- Black fabric paint
- Paint brushes (medium size)
- Drop cloth or cardboard (for protecting your work surface)
Instructions:
- Prepare the Helmet Base: Start by cleaning the Viking hat to ensure the paint adheres well. Place the hat on a drop cloth or cardboard to protect your work area from paint spills.
- Paint the Helmet Yellow: Using a medium-sized paintbrush, apply yellow fabric paint to the entire helmet, covering all visible areas. This will serve as the base color for Pikachu’s head. Allow the first coat to dry, then apply a second coat if needed for full coverage.
- Create Pikachu’s Ears: The existing Viking horns can easily be transformed into Pikachu’s ears. Paint the tips of the horns with black fabric paint to mimic Pikachu’s distinctive ear design. Be careful with the edges to create a clean line between the yellow and black sections.
- Let it Dry: Allow the hat to dry completely before handling it. Depending on the thickness of the paint, this may take several hours or overnight.
- Final Touches: Once the hat is fully dry, it’s ready to wear! Pair it with a yellow outfit to complete the Pikachu look.
Instructions for Creating a DIY Pikachu Leotard:
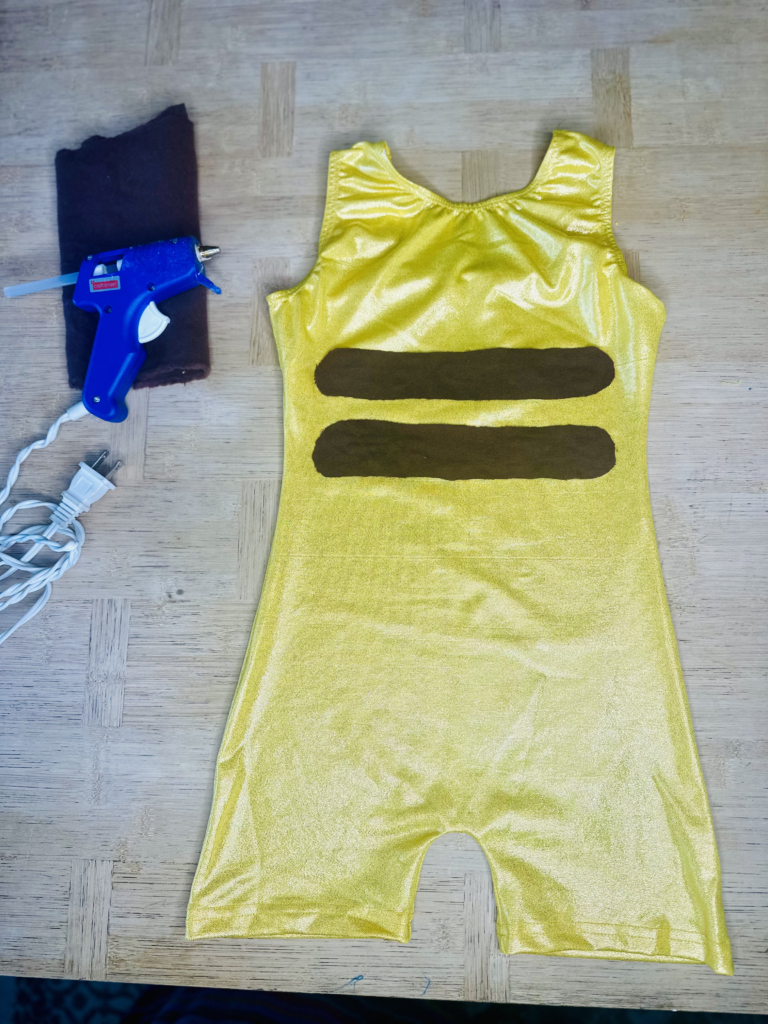
Supplies Needed:
- Sparkly yellow leotard
- Brown felt
- Scissors
- Hot glue gun
- Measuring tape or ruler (optional for precision)
Instructions:
- Prepare the Leotard: Lay the sparkly yellow leotard flat on a clean surface to ensure you have a smooth area to work with. Make sure the back of the leotard is facing up, as this is where the stripes will be applied.
- Cut the Felt Stripes: Using brown felt, cut out two or more stripes that will be placed horizontally on the back of the leotard to replicate Pikachu’s iconic look. Measure the width of the leotard to ensure the stripes are proportional and evenly spaced.
- Attach the Stripes: Heat up the hot glue gun and apply a thin line of glue along the back of each felt stripe. Carefully place each stripe onto the leotard, pressing down gently to ensure they stick well. Be sure to position the stripes horizontally across the back of the leotard, evenly spaced apart.
- Let it Dry: Allow the glue to dry completely before handling or wearing the leotard. This step is crucial to ensure the stripes are securely attached.
- Final Touches: Once the glue is fully dry, the leotard is ready to be worn. Pair it with the DIY Pikachu hat and tail to complete the Pikachu costume.
Couples Pokémon Costume Ash Ketchum and Misty
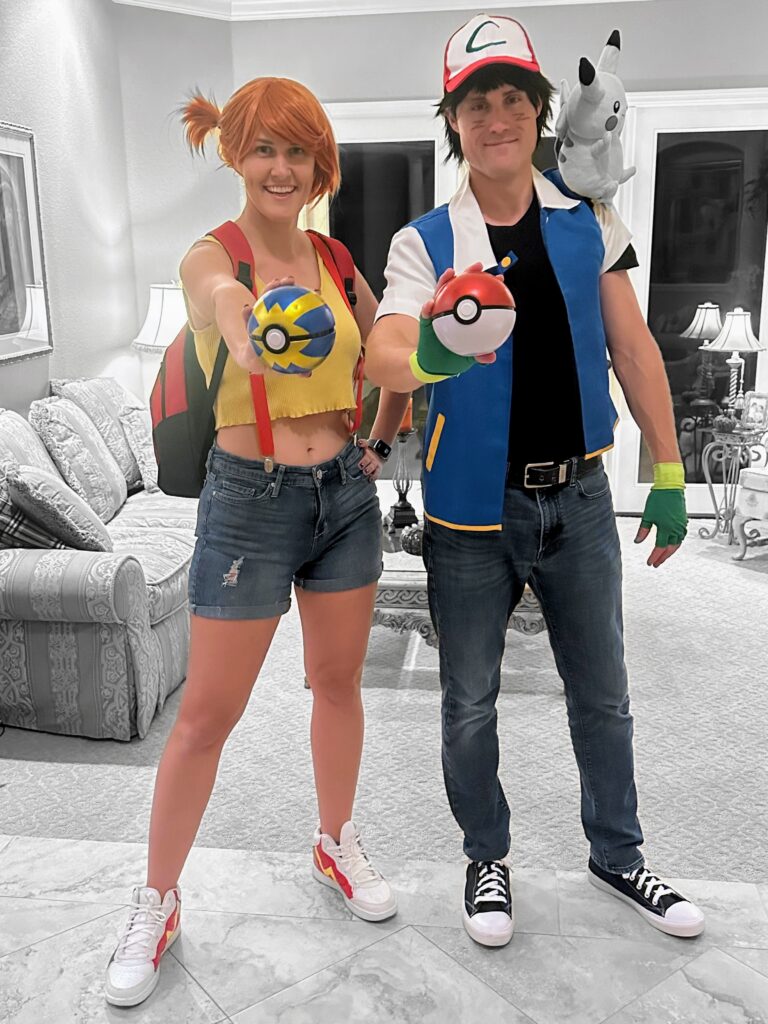
DIY Misty Pokémon Costume
DIY Misty complete with her signature red suspenders and yellow tank top was a low-maintenance and comfortable option for my costume. I found some great white shoes on clearance and had a lot of fun painting shoes for the first time— it was much easier than I had imagined and they held up surprisingly well.
Misty DIY Costume Supplies
- Red suspenders
- Jean shorts
- Yellow crop-top (or tank)
- Red backpack
- Orange wig
- White shoes
- Acrylic paint
- Paintbrushes
Custom painted Misty Pokémon shoes
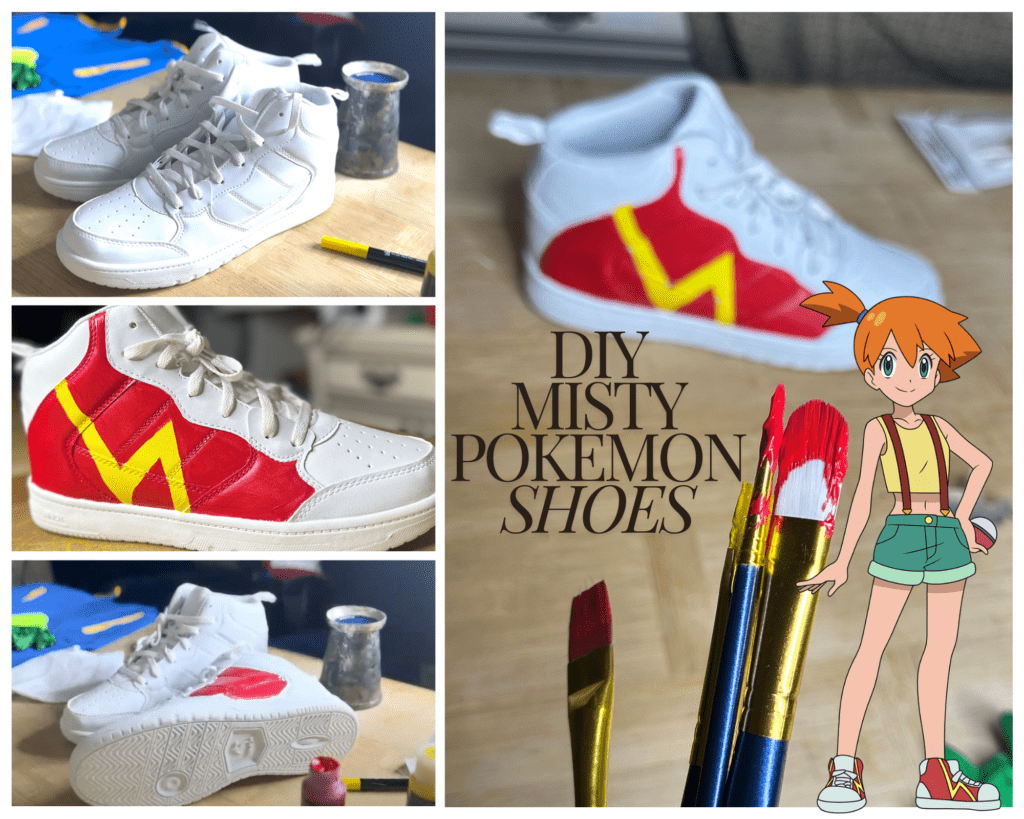
Supplies Needed:
- White high-top sneakers
- Red and yellow acrylic paint
- Paintbrushes (small and medium sizes)
- Painter’s tape (optional for clean edges)
- Paint sealer (optional, to protect the design)
Instructions:
- Prep the Shoes: Start with a clean pair of white high-top sneakers. If you want clean edges where the colors meet, you can use painter’s tape to section off the areas you’ll be painting.
- Paint the Red Sections: Using a medium-sized brush, apply the red acrylic paint to the sides of the shoes, creating the bold red areas seen in Misty’s shoes. You may need to apply multiple coats for full coverage, letting each coat dry before adding the next.
- Add the Yellow Lightning Bolt: Once the red paint is fully dry, use a small brush to paint the yellow lightning bolt design on the sides of the shoes. This bold, zigzag pattern is iconic to Misty’s character and adds the finishing touch to the shoes.
- Seal the Design (Optional): To ensure your design lasts, consider applying a clear paint sealer once everything is dry. This step will protect your work from wear and tear, especially if you plan on wearing the shoes often.
- Final Touches: Let the shoes dry completely before wearing them. You’re now ready to step into Misty’s shoes—literally!
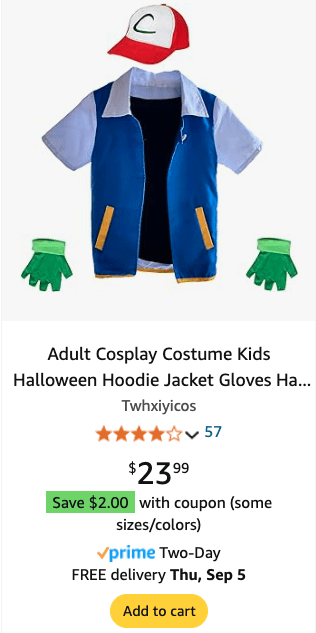
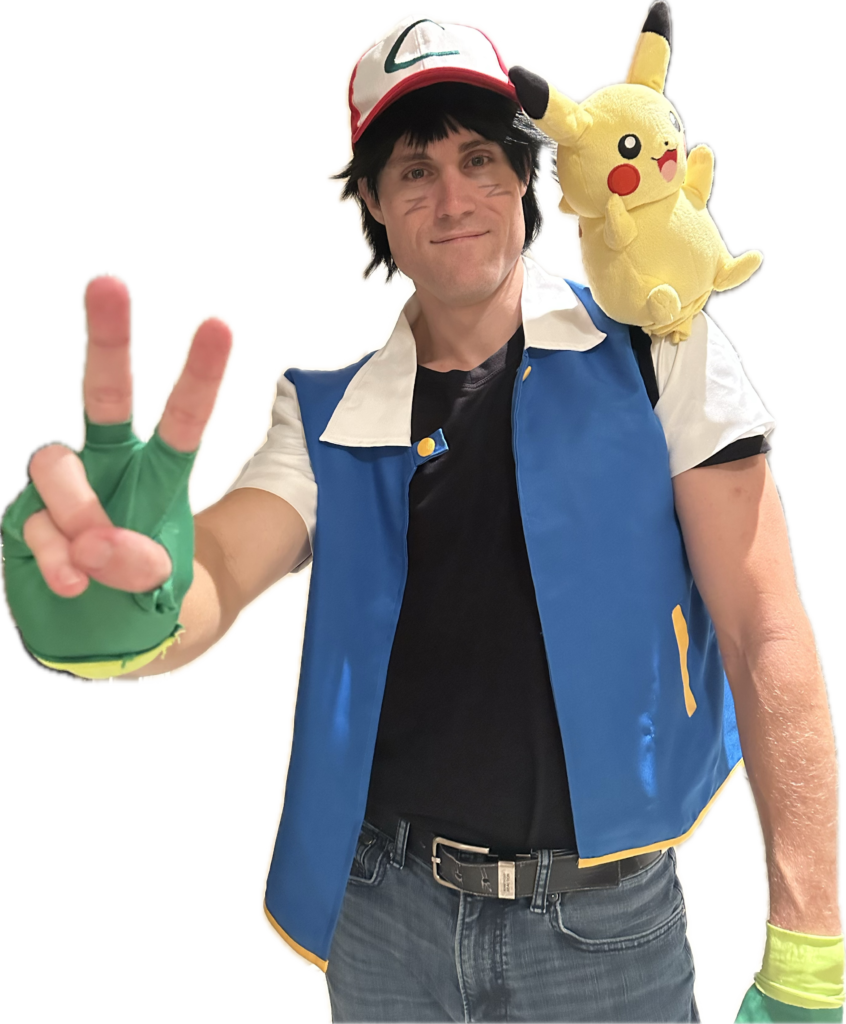
Ash Ketchum Costume
Pokémon Trunk or Treat Theme
I hope our Pokémon costumes inspired your Halloween plans! If you try any of these ideas, or if you have your own unique family costumes, I’d love to hear about them in the comments. Let’s make this Halloween the most memorable one yet!
